Batch Image Upload
The Batch Image Upload process allows you to upload multiple images at once and automatically assign them to their respective items.
Each image must be mapped to a single item. If you have a folder of images named 1, 2, 3, and so on, Auctria will automatically assign each image to the item with the matching item number.
Assigning Multiple Images to One Item
To assign more than one image to the same item, name the files using the format 1_a, 1_b, etc. Both images will be assigned to item 1.
Assigning the Same Image to Multiple Items
To use the same image for multiple items, make a copy of the file locally on your computer for each item and rename each copy to match the relevant item number. Then upload the folder as normal.
Step 1 — Open the Upload Images Dashboard
From the main Event Dashboard, click Items (left sidebar, Details) Upload Images.
This will open the Upload Images dashboard.
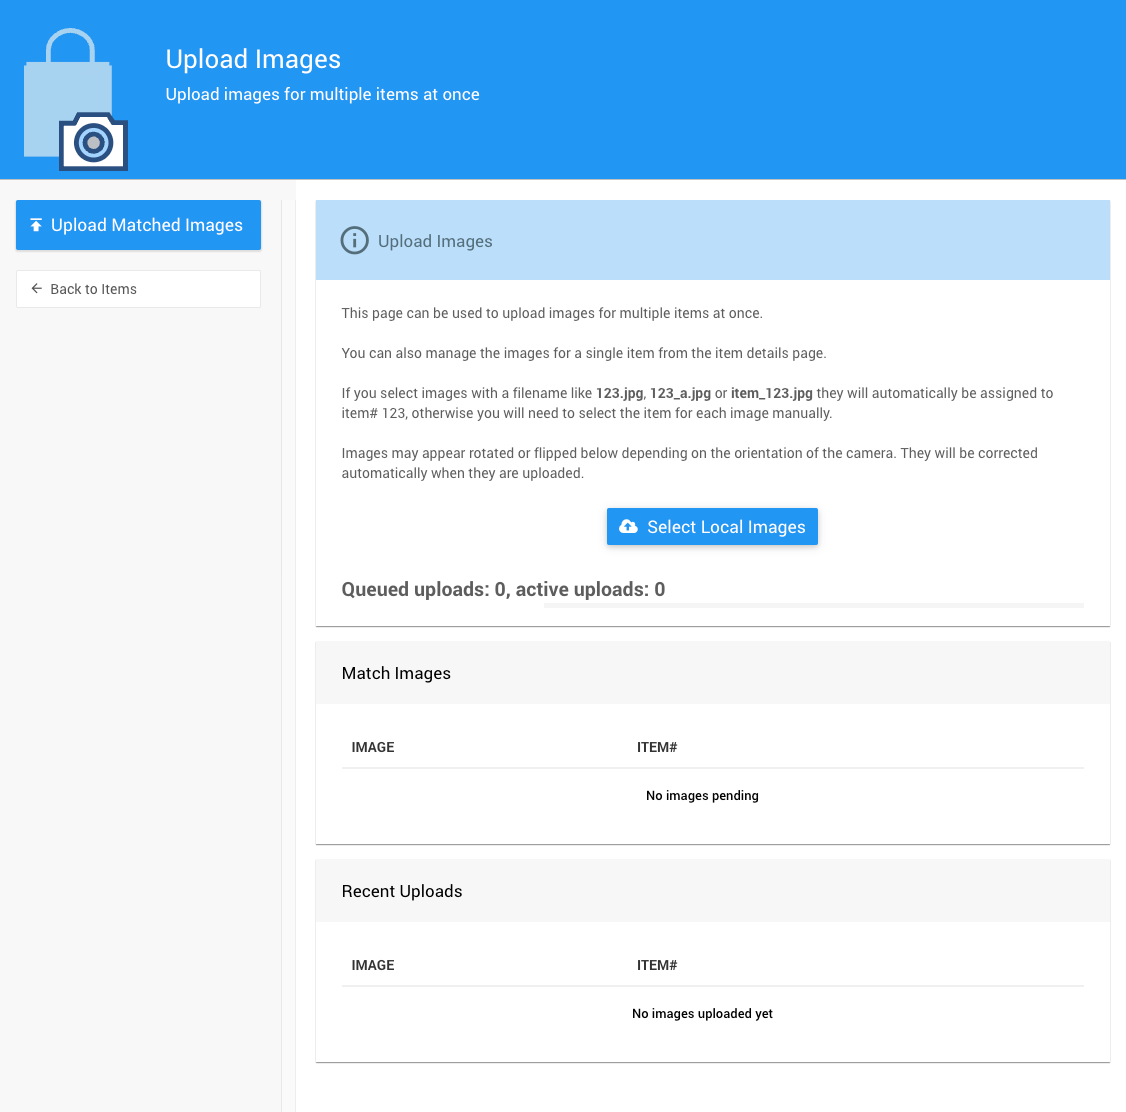
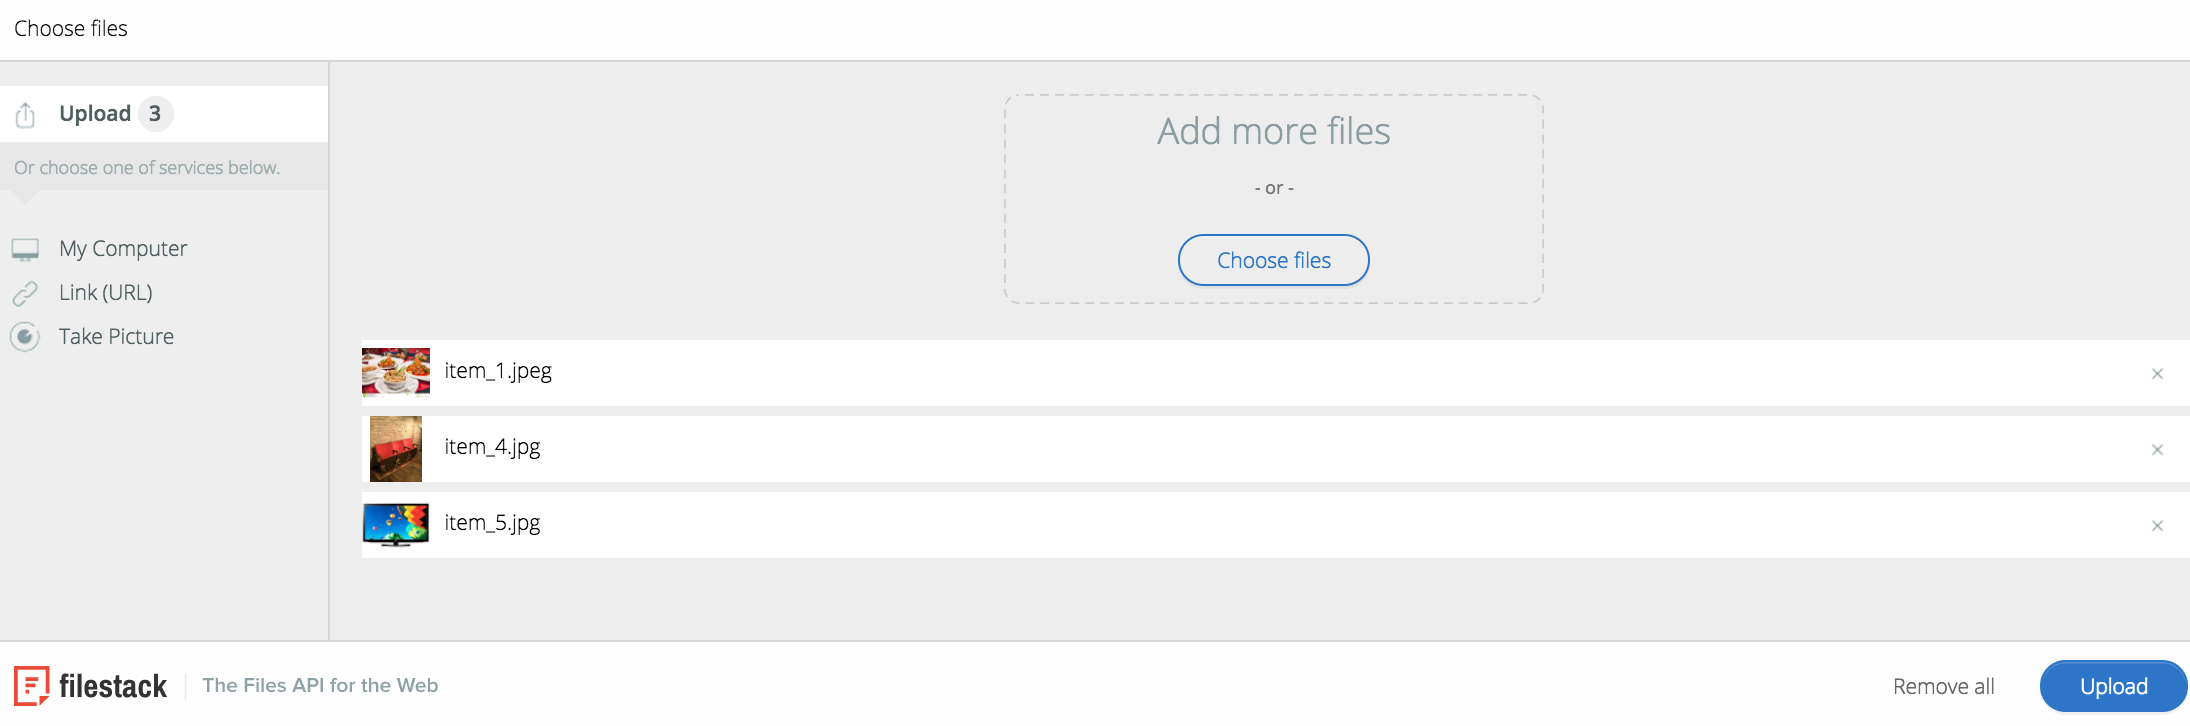
Step 2 — Select Images
Click the Select Local Images button.
Click Choose files to browse for images. To upload a whole folder at once, select the folder, click Open, and Auctria will list all the images it contains. Select the images you want to upload and click Choose, then Upload.
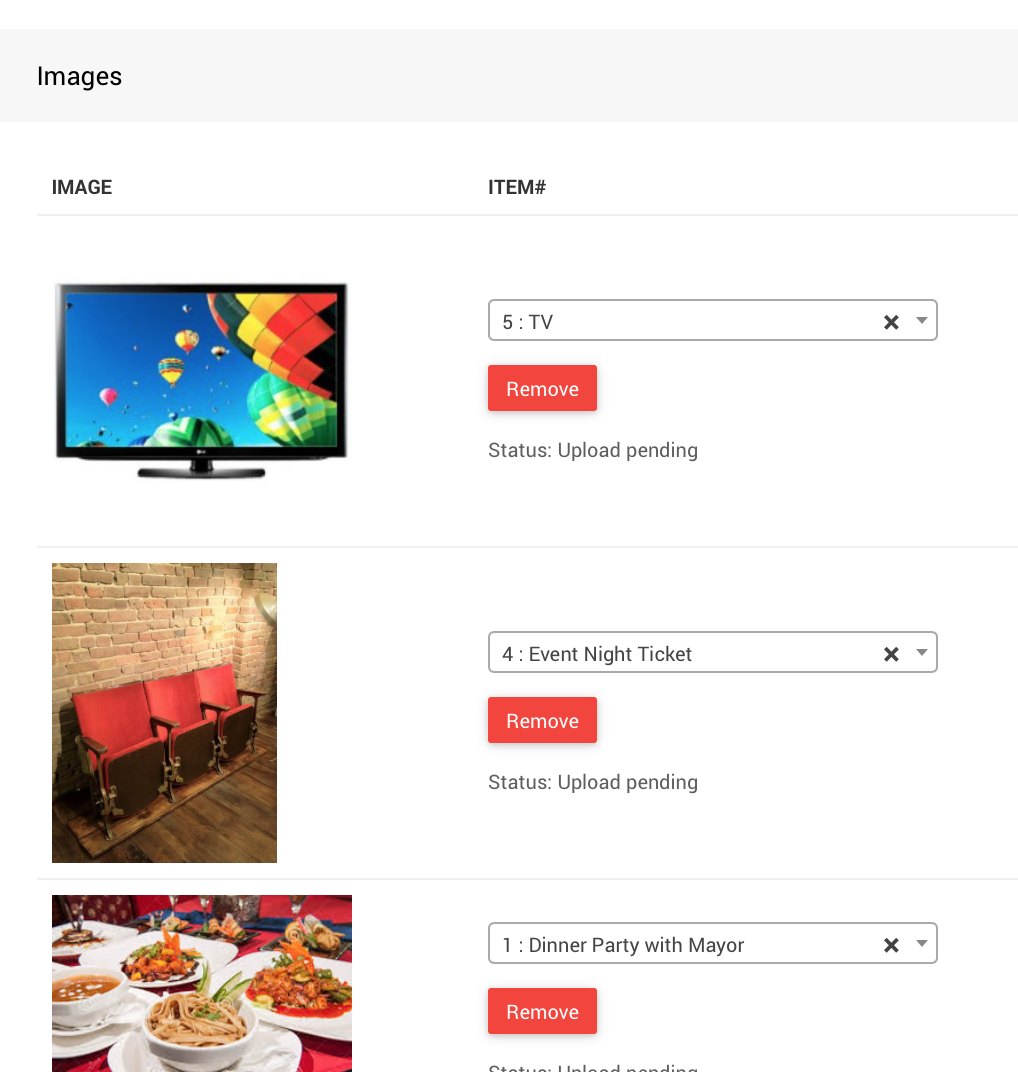
Step 3 — Review Image Assignments
Auctria will list the uploaded images alongside the item each one has been mapped to. Review the assignments and make any changes needed — you can update the item mapping or remove an image before finalizing.
Step 4 — Upload Images
Once you're satisfied with the assignments, click Upload Images to complete the process.
Recommended Image Proportions
Exact dimensions aren't critical since screen sizes vary, but the following aspect ratios work well for most uses:
| Use | Aspect Ratio |
|---|---|
| Background and item images | Rectangular (16:9, 4:3, etc.) |
| Logos | Square (1:1) |
| Banner images | Long and thin (e.g. 6:1) |
See Image Dimensions And Sizes for specific size recommendations.
Last reviewed: April 2026